Sunday, November 22, 2020

Walk highway 20 in 2020 - camping

    Why go camping along a highway?

    It's understandable if you're travelling by car but camping while walking is usually associated with backpacking which takes a person as far away from roads as possible. So why go on a camping trip next to a highway? 

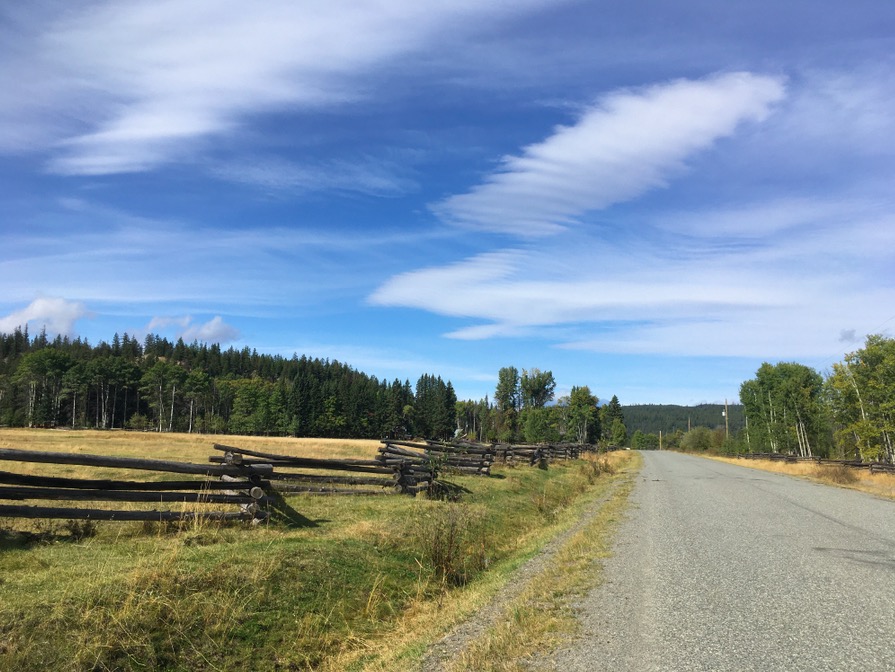
    Quite simply, highway 20 is lovely and quite peaceful for a road. It might not be as spectacular as a road through the Rockies but there's a lot less traffic.


    Highway 20 at Half Way Ranch - slightly spectacular


    There are also practical advantages. 

    • Walking along a road makes it possible to carry gear on a trailer which is a much easier than carrying it on your back.
    • Travelling solo along a highway (at least highway 20) is safer than a solo wilderness trip. 
    • It's easy to get re-supplied, dropped off, and picked up along a road.

    Why not bicycle instead of walk?
    A bicycle is undoubtedly the most efficient human-powered way to travel a road. West of Tatla Lake, I met a cyclist who was on a solo tour through Pemberton, Lillooet, on his way to Bella Coola then Vancouver Island. He was covering more than three times as much distance per day as me but I was happy travelling slowly. I wanted to savor my time in this interesting landscape. The faster you move, the less you see and a bicycle trip along highway 20 would be over in a few days. I also think walking is safer than cycling.   


    Finding campsites  

    The ideal tent campsite has soft and flat ground, some large trees but not too much brush and is hidden from the road. With some planning, it was usually easy to find sites with most of those qualities. However, an issue that you don't have on a wilderness walk is getting around fences. Barbed wire fences run along both sides of highway 20 for most of its length and there are many stretches where I could walk for an hour or more without seeing a gate or cattle guard. I planned for this before my trip by looking for intersections with forest and range roads because they would have a gate or cattle guard. These were pretty easy to find in Google Earth. 

    A lovely campsite in an open Lodgepole pine stand


    I did have to cross a barbed wire fence to get to one campsite. Once I accepted the fact that I wasn't going to find a gate or cattle guard late one afternoon, it wasn't that hard. I unloaded it, took the wheels off, wiggled it under the bottom fence wire, put the wheels back on, and reloaded it. 


    Getting the trailer through a barbed wire fence


    When the weather's bad, there is no such thing as the perfect campsite. Luckily, I arrived at the Chilcotin Hotel late on a rainy afternoon in 2019. That was only my second night on the road but the shower and hot meals were greatly appreciated. Even when the weather was fine, I didn't pass up opportunities to use roadside accommodation, including Kinikinik in Redstone, Tatla Manor in Tatla Lake and Stewart's Lodge in Nimpo Lake. So, another reason for going camping along a highway is the ability to take breaks from tenting. 

    Eating is just as important as sleeping while on a long walk and restaurants provided a welcome break from dehydrated meals. I'll talk about food in another blog.  

    Wednesday, October 14, 2020

    Walk highway 20 in 2020 - first, make a trailer

    Last year I started walking highway 20 from Williams Lake to Bella Coola. In 2020, I wanted to continue where I left off, pulling my supplies like last year (first of three blogs about my 2019 walk) but this time with a home-made trailer. This would be a great project in the early days of the year while dreaming of a long walk. 

    I ordered this trailer kit from Wike in Ontario. It includes a little tow bar that's made for attaching to a bicycle which I didn't need but otherwise it was just what I needed. The black things are sturdy plastic injection mouldings. Four of them are for the corners and the other two are quick-release wheel mounts. 

    Do-it-yourself trailer kit from Wike

    I didn't work from a proven design so it wasn't a surprise that I had some technical issues. The 1" x 1" fir frame was a good idea but the first bottom platform I made was of thin plywood. A quick test of the trailer revealed that trailer contents vibrated seriously when rolling on a rough surface. In retrospect, this was the lack of a suspension. So I replaced the plywood floor with discarded bike tire inner tubes which were headed for the dumpster (thanks Red Shred's Bike and Board Shed). This eliminated the vibration. Yeah! 👏 To be safe and to prevent things from falling through the little gaps, I stretched another bottom of pack cloth on top of the woven inner tubes.  

    Trailer with bottom made with bike tire inner tubes. 

    I started my walk on Bailiff Road along the beautiful Chilcotin River west of Bull Canyon. This 20 kilometre section, where I left off in 2019, was part of highway 20 up until the 1960's and is one of the prettiest side trips available. A couple hours into my walk, I noticed that one of the two bungee cords that hold the roof down  had fallen off. I spent the next hour looking for it but I shouldn't have bothered because it only took 20 minutes to make a substitute with a spare piece of bicycle inner tube. Fortunately, I found two bungee cords along the road shoulder in the next two days. I didn't have any other trailer problems that weren't easily fixed. 


    Front of trailer with bungee cord
    Front of trailer with replacement bungee cord. 

    The finished trailer has about twice the volume of a large backpack so it provides a rather luxurious space. Fully loaded with a week's supply of food, it weighed 109 pounds (49 kg) which included a 10 pound bear-resistant container and a lot of cold weather clothes than I didn't need. Pulling it on pavement was easy as pie as long as the grade wasn't more than a few percent. Soft shoulders and uphill grades of more than 5 percent were quite a bit harder. Fortunately, highway 20 is mostly gently rolling and traffic is light enough that I could safely walk on pavement more than 90 percent of the time. 


    Trailer on the road in west Chilcotin


    Next blog, what's it like camping along a highway?

    Wednesday, March 25, 2020

    A quick and healthy bread

    Whole grain, nut and date quick bread 


    Do you love homemade bread?

    Do you wish that bread could be healthy AND delicious?

    Do you have an oversupply of survival ingredients? 

    If "yes" then read on.

    For years, one of my favourite breads has been a whole-grain sourdough that was inspired by a type of Bavarian whole grain bread (vollkornbrot). My recipe is here Pat's fermented ultragrain. In fact, I'm so enamoured with fermented bread that I rarely make  bread any other way. However, it does take a few days to make, so I thought it would be interesting to create a grainy and healthy bread that could be made in a couple of hours.

    In these days of self-isolation, I also wanted to make a recipe that does't require any fresh ingredients like milk or eggs. This one uses only things that one might have stashed away for the long haul. 

    It is healthier than a typical quick bread because it has high fibre and low sugar. The only sweetness is from dried fruit and a little honey so it's not sweet by modern standards. However, it's rich and filling with whole grain, milk, nuts and dates. It also contains turmeric, about which there are many interesting health claims such as suppressing inflammation and boosting the immune system.

    Quick bread with whole grain, walnuts, and dates

    Ingredients

    You'll need a non-stick 9 inch loaf pan or a regular 9 inch loaf pan with parchment paper or non-stick spray.

    Dry ingredients

    • 2 cups whole grain flour
    • 1 cup rolled oats
    • 1 cup chopped walnuts (or other nuts)
    • 1 cup chopped pitted dates (or raisins, dried cranberries, etc.)
    • 2 tablespoons flax seeds
    • 2 teaspoons turmeric
    • 1 teaspoon baking soda
    Wet ingredients

    • 2 cups milk (fresh or from instant powder)
    • 1/2 cup vegetable oil
    • 2 tablespoons warm honey
    Directions

    If using a regular loaf pan, coat the inside with non-stick spray or cut a piece of parchment paper to fit inside like this.

    Parchment paper can be re-used even though it turns brown

    Pre-heat oven to 350 degrees F.

    Chop the dates to reduce their size and to make sure there aren't any pits. You definitely don't want to bite into a date pit.

    Mix all dry ingredients in a big bowl.
    In a separate bowl, combine all wet ingredients.
    Add wet ingredients to dry ingredients and mix thoroughly. The mixture will be quite wet.
    Pour into loaf pan.

    Bake at 350 F for 45 minutes.
    Reduce heat to 250 F and bake for an additional 40 minutes.

    If you have an instant read thermometer, the internal temperature should be about 85 to 88 C (185-190F).

    My favourite way to serve this bread is toasted with peanut butter. It's also delicious turned into "crostini". Do this by slicing fairly thin and baking at 200-250 F until crisp.   


    Variations

    Substitute almonds, sunflower seeds, or pecans for the walnuts.
    Substitute raisins or dried cranberries for the dates.
    If this bread contained greens (e.g. dried kale or spirulina), it would be a balanced meal!

    Same recipe except raisins instead of dates